
Wood into Gold, and Other Tales of Transformation, Part 4
December 4, 2016

And you thought Wagner’s Ring Cycle was epic…. How better to celebrate marriage than with Viking helmets and shattered wine glasses? In this fourth and final installment, the plan was to make my ring from whatever gold was left after making her ring. But alas, I did not have enough gold left to make a whole second ring. I had two choices. Buy more gold, or make my ring out of something else.
I had contemplated this possibility some time ago and already knew my answer. Being a blacksmith, I thought it would be cool to forge my ring from steel and to inlay a thin band of the gold into the steel. I may well have opted for this even if I had had enough gold to make a second ring.
[Brief aria for teutonic tenor]—“Ode to My Scrap Pile.”
I have a sizable collection of scrap metal that most people mistake for junk. Rods, bars, plates, blocks, coil springs, railroad spikes, lawn mower blades, etc, etc…. Whenever people help me move, I invariably have to make sure that no one tries to discard items from my scrap pile. It is hard to describe, but I have deep affection for my scrap pile. I have been hauling it around for quite some time. I like how it is all waiting to be turned into something new again. It seemed fitting that my ring ought to come out of my scrap pile.

A tiny part of my scrap pile resides in this bucket. My ring came out of this bucket.
Forging a ring is not as difficult as it might sound. There are different ways you can do it. You can bend a band of steel into a circle then forge weld it. Or you can punch or drill a hole, then enlarge the hole using a tapered rod called a drift. I did the latter. You just have to be sure to do things in the right order. For instance, if you need to increase the thickness of the steel, you must do that before creating the hole. Forcing a drift through the hole will only enlarge the hole—it will not cause the surrounding steel to become thicker. And even more generally, trying to work on the outside of the ring once the hole has been created will make the hole larger than you want. Therefore you must establish the basic exterior shape prior to creating the hole.

There is a very old blacksmith adage that goes:
“He that will a good edge win, must forge thick and grind thin.”
That adage can be found in Joseph Moxon and pertains to the making of edge tools. But it may as well refer to forging a wedding ring. At least for me. Sure, you could forge a ring so that the forged band is itself the finished product. But I had other plans. Plus I had never created a piece of jewelry like this, so I made sure to leave the ring a bit fat, so that I could sneak up on what I wanted.
After forging, I rounded the outside of the ring with files and beveled the edges. Then it was time to create the channel for the gold. I did that with a combination of chisels and a very thin file used on edge. The proportions and straightness of the channel I arrived at by eye, adjusting things here and there as I went. The trickiest part was undercutting the sides of the channel. I think my eyes are getting old. Even with magnification, I found it hard to see.
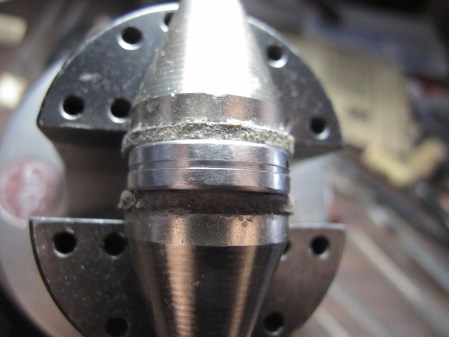
The sides of the channel are undercut in order to trap the gold when the gold is hammered into the channel. The gold will mushroom, creating a dovetail of sorts, mechanically trapping it. No adhesives are required.
Getting this exactly right was trickier than it might sound. It took me a couple of tries. For instance, I found it important to not make the channel too deep. For one thing, it wastes gold. But for another, a deeper channel means that the strip of gold needs to be taller, and when you hammer the taller strip into the channel, the force of your blows will deform the uppermost gold and not the deeper gold at the bottom of the channel. Therefore you don’t get good capture. The gold’s malleability can work against you a little.
Fourteen karat gold is probably not the best gold for inlay, either. It has very particular working properties. It is harder, because of its copper content, so it requires more force, but then it also work hardens faster than higher karat golds.
My solution was to very carefully craft the strip of gold in order to maximize the desired effect when force was applied to it. This is what I mean—instead of creating a perfectly square or rectangular strip, I created a beveled strip, like this:
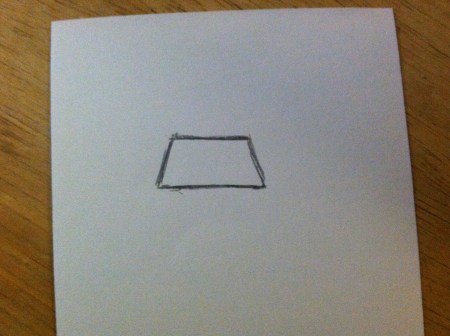
A trapezoid, basically. The force applied with the hammer must go somewhere—a trapezoidal shape reduces the nonessential gold into which that force might have flowed. It guarantees that the gold at the bottom of the channel will spread into the undercutting.
It might go without saying, but it is important that the width of the gold strip match the width of the channel as closely as possible. Otherwise the gold’s malleability gets wasted spreading the gold into space that a better-fitting strip would have occupied in the first place.
[Aria for Nordic Shop Cat]
OK. All of this assumes that you have a strip of gold to work with. But the gold I started with was scrap just like the steel. Only it was in far worse shape than the steel scrap. The gold scrap was mostly dust and filings, with bits and nuggets thrown in for good measure.
A professional jeweler would melt this scrap into an ingot, then roll the ingot into a strip using a small but stout rolling mill. Well, I don’t have a rolling mill. If my shop cat Charlie were still around, this would have been a perfect job for him—to hammer the tiny ingot into a strip using his tiny hammer. But Charlie rode off into the sunset on that big beer truck in the sky some time ago. So this tiny smithing job was left to me.
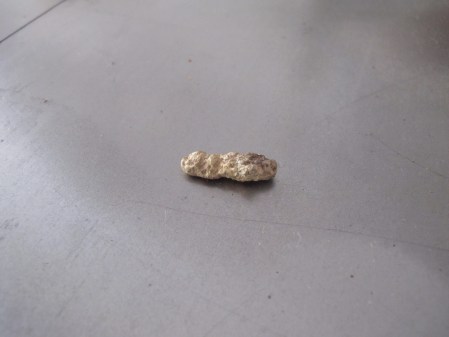
My first couple of attempts at making an ingot yielded unacceptable results. This one I named “Gold Member.”

And this one, “The Turd.”
Then when I got an ingot worth forging, the seemingly countless cycles of work hardening and annealing made me realize that I was trying to work the gold too much like steel. I should have cast the gold into a shape that resembled the final shape as closely as possible. Screw the ingot.
Using an 8d nail as a pattern, I cast the gold into a long cylinder. From there it was a matter of drawing the cylinder out into successively narrower cylinders. To do that I used a series of successively narrower grooves that I filed into a block of steel (another piece from my valuable scrap pile, I might add), essentially creating a miniature swage block. I hammered the gold into one groove until it was as long and as slender as that groove could make it, then I would move to the next narrower groove. And so on.

The final step of course was turning the slenderest gold cylinder into the trapezoidal strip. That involved a lot of careful crafting. From start to finish the whole process was quite laborious and time consuming, nothing like what a professional jeweler would do. Such is life.
The final final step was to inlay that trapezoidal strip into the steel ring. The trickiest part of this was estimating where to cut off the strip in order for the end of the inlay to meet the beginning. I’m sure there is a way to calculate this, but I would rather just look and do.

This is what the gold looked like freshly hammered into the groove.
The final final final step was to clean up the inlay and ring with files and progressively finer sandpaper wrapped around small sticks. The inside of the ring also needed attended to. I left it until last. I had stretched it to just shy of my ring size with a drift. I used files and sandpaper to get the fit just right.

Here is the same edge cleaned up. I can no longer tell where the two ends of gold meet.
So that’s it. A wedding ring for her. A wedding ring for me. It was an interesting and meaningful project. So maybe it wasn’t as epic as Wagner’s Ring Cycle. I would take my wife over a boring valkyrie any day of the week.
