
Wood Into Gold, and Other Tales of Transformation, Part 3
October 14, 2016
Let me begin by stating the obvious—gold is expensive; very expensive. I had never worked with it before and honestly found it a bit daunting at first. In my world, dust does not have value—it’s just the opposite. Wood or steel dust can be a nuisance, even. It can make you sick; you track it everywhere; if you own a shop cat, your shop cat tracks it everywhere; both of you bitch about it. Your significant other bitches about it. That is the world of wood and steel.
The world of gold, on the other hand, is populated by people who hoard dust. Their shop cats hoard dust. Their significant others likely never even see the dust, because every possible crumb of it has already been hoarded. People have been collecting gold dust for hundreds of years, as is evidenced by the artwork above, depicting 16th century goldsmiths. Notice the fabric or leather “slings” beneath the bench pins on the nearside of the workbench? Contrary to popular opinion, those are not comfort slings for the goldsmith’s manhood. They are slings for catching gold filings. If you look closely, you can see that all four work stations at the bench have one. Gold is so valuable, there is virtually no amount of it that has no value. That is the world of gold.

The idea was to juxtapose an organic element with a geometric element. And if you are wondering who “Kay” is, so am I…. I bought this engraving vise secondhand a long time ago.
It took a couple of days to make the transition from the world of wood and steel to the world of gold. But once I had made it, I felt great. Detailed metalwork is something that I particularly enjoy. The only difference was that now, every so often, my mind would tell me that the table was getting a bit messy; that it wouldn’t be a bad idea to scrape together the loose gold chips and filings. Yes, I had indeed become one of them.
The gold felt soft, almost “sticky,” as I worked it. It was fairly malleable, although not quite as malleable as I had expected it would be. It worked a lot like copper, which isn’t a big surprise, considering that the gold was from my old wedding band, and my old wedding band was made from 14k gold, an alloy that contains an appreciable amount of copper. Many wedding bands are made from 14k gold because it is more durable than higher karat golds.
 My tools for shaping metal are a mixture of purchased and homemade. I carved the gold, chased the gold, and filed the gold, all in whatever order and to whatever degree struck me as the best method at a given moment. I call it my “look and do” method, pretty much the same as sharpening saw teeth, simply seeing what needs done then doing it. And not getting hung up on any preconceived idea about how it ought to be done.
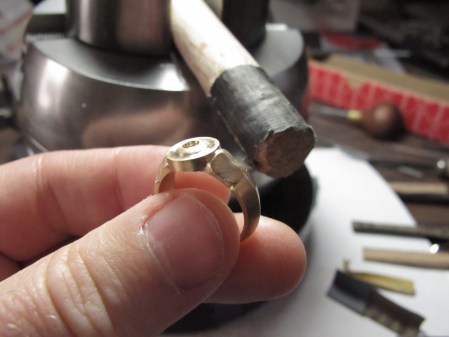
The shaping of the ring at an intermediate stage. You can see that the undercutting of the foliage has not yet been done. Just as with carving wood, undercutting is one of the last things to do.
My tools are not specifically for jewelry, of course. There were several times when I did not have tools that a professional jeweler would have. For instance, I did not have a rotary handpiece, such as a Foredom, which would have come in handy for setting the stone. The sapphire was 3mm in diameter, and while it isn’t normally tricky to drill a 3mm hole, with this ring it was a little different, because my goal wasn’t simply to drill a hole—my goal was to create a recess just deep enough to seat a flat-bottomed stone, so that I could burnish the gold to permanently capture the stone. The width of the cavity was to be just enough to allow the stone admittance. Therefore the hole wasn’t exactly 3mm, it was ever so slightly larger.
My solution was to use a sequence of engraving tools, rotating the ring in my engraving vise, gradually enlarging and deepening the cavity as I went. It took a lot of trial fitting. And lots of care.
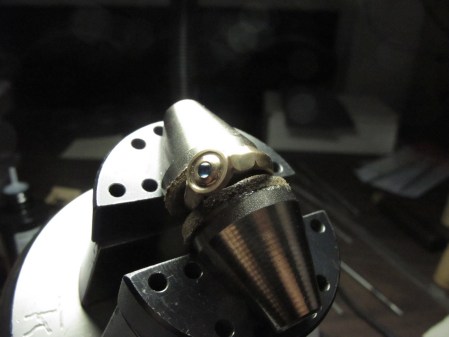
Here, the stone is in place, and the gold has not yet been burnished to capture it.
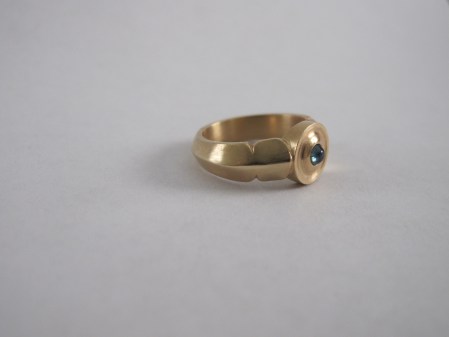
I refined the shapes until I had almost reached their final surfaces. Then I scraped, burnished, and polished until I had reached the final surfaces, and those surfaces looked the way that I wanted them to. I reached a point where I felt that I could not make things better. Which isn’t to say that I thought my work was perfect. I don’t know that I’ve ever done anything that I felt was perfect. But I had reached the point where it was the best that I could do.

I was shooting for a satin finish, not a high gloss finish.
So that is pretty much it. This ring certainly involved some challenges and learning curves. Was it the most difficult project I’ve ever tackled? No, not really. And it certainly wasn’t the biggest. Or the most ambitious. But I will tell you this—I cannot think of a project that has meant more to me.
Don’t miss the final installment in this four-part series. The final installment is about how I made my own ring. It isn’t more of the same—it is a very different sort of ring and project.
