Certain parts of the saw making process seem to particularly intrigue people. For instance, people almost always comment on the teeth–“How do you make all of those teeth? Do you buy the blades with the teeth already on there? Do you file the teeth in? Do you have a machine that stamps them in, all in one shot?” People don’t just wonder about it, in other words—they really mull it over and think about how it might be done. That spark in people’s eyes is a familiar sight to me at this point. When people ask those questions the way they do, they may not realize it but they are under the spell of the Western saw. It’s a taste of the same preoccupation that has no doubt given us the Western saw as we know it.
The way I make saw teeth is by punching them with a fly press. I’ll show you in detail how I do it. It’s really similar to how the old makers did it. But first let me give you a little background. This is the third method I’ve used to make saw teeth—-the very first method I used was to simply file them in. That way obviously works and is fine if you only want to make a saw or two, but it is woefully slow and wasteful of files, and in my opinion has no real advantage to recommend it. People sometimes imagine this must in fact be the oldest way that saw teeth were ever created, and I would seriously doubt that. Back that long ago files were handmade and were not nearly as trivial an item as they are now. Plus, saws were made by blacksmiths, and blacksmiths use punches like woodworkers use drill bits–just a dirt common way to pierce your material. The oldest method I know of for creating saw teeth was to punch them individually using a small handheld punch of some kind that was struck with a hammer and moved along by eye (1). I think it was probably sort of similar to the way the teeth of some Japanese saws are still punched today.
Check out these videos of Japanese tools being made. The two videos on the left are about saws (All four videos are worth watching, though). The second one from the left shows a small hand held punch being used to punch teeth.
The next method I used to make teeth was a vintage Foley retoothing machine. I actually own two of them. It’s a clever little machine for its combination of simplicity and competence, but in use it wound up appealing to me about as much as volunteering for Highway Patrol Taser practice. There’s nothing wrong with them, mind you. I just didn’t care for it. It felt like I was feeding my saw plates through some kind of Gatling gun. I’m making saws, not charging San Juan Hill. The real question here is why do I own two of them? Well, that way I’d always have at least one in good working order; I bought them more or less simultaneously. So my plan didn’t flop at least. They both work. Plus if someone ever tries to break into my house I can always feed a saw through the Foley and watch the guy fill his pants.

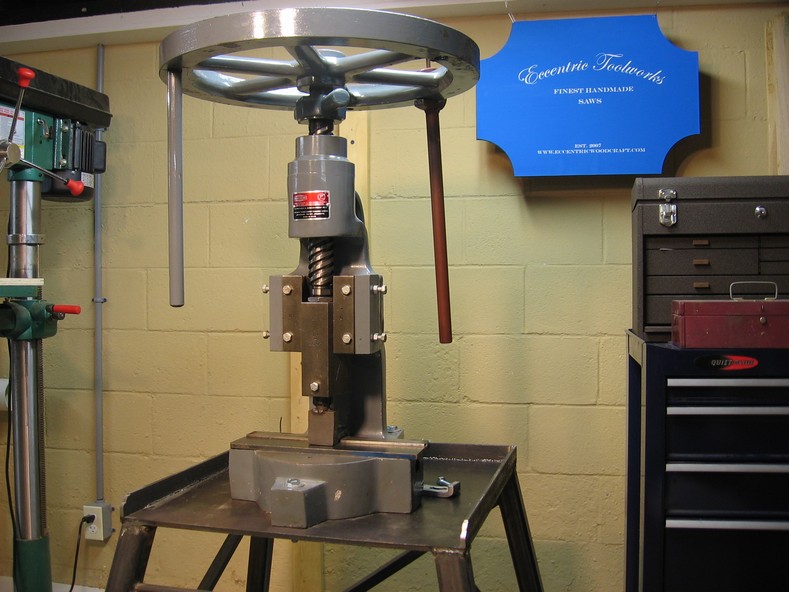
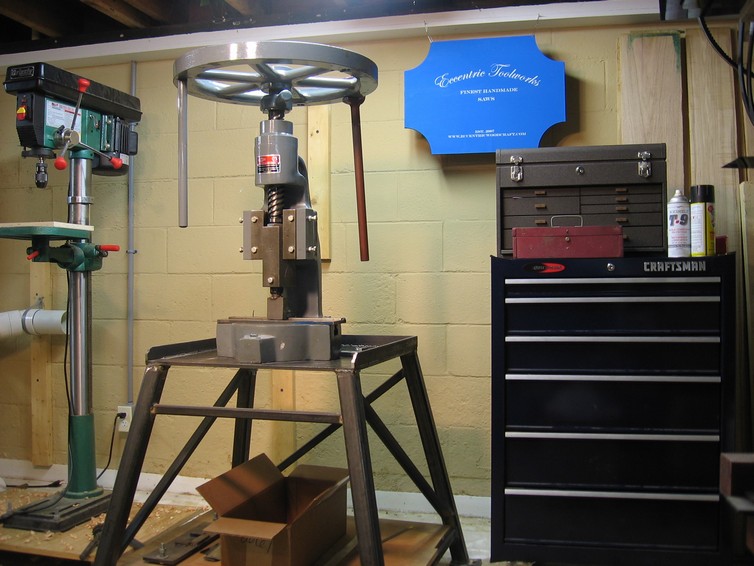
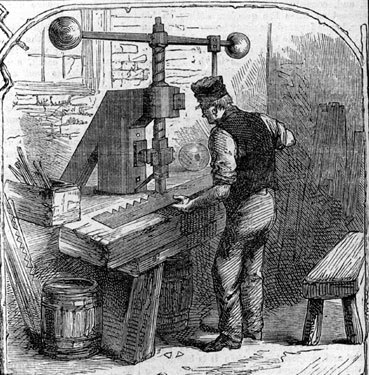
So now we get to the fly press. I’d already owned it for probably about a year and had been steadily implementing it in my work. I was up to my eyeballs in the hunt with the old makers, and so now I got the idea that I would figure out how to punch my teeth using the press as well. It’s not quite as simple as it might seem. Check out this old engraving here, along with the one at the top of the page.

These guys are punching awfully large looking teeth, don’t you think? As detailed as these engravings are, it seems to me they have been artistically treated in order to make them “read” better. For instance, in addition to the tooth size, I’m fairly certain that a device is missing from these engravings that I have seen referred to as a “toothing gauge.” A toothing gauge was a device that controlled the depth, spacing, and rake angle of the teeth as they were punched. I’ve seen one referred to in a Beardshaw inventory from 1823 (2), and I read a description of one in Holtzapffel’s second volume on “Turning and Mechanical Manipulation.” I’m not aware of a surviving example of a toothing gauge, although I’d be a little surprised if, in all of the flotsam out there, there wasn’t at least one of these things still adrift. Just some unheralded hunk of rusty iron somewhere.
You might wonder why it is that Western makers wouldn’t just space the teeth by eye like the Japanese makers are doing in those videos linked to above. Well, there are two big reasons as I see it–because believe me, I thought about it. First, a fly press requires you to hold the plate with one hand and to turn the weighted wheel or arm with the other. Good luck keeping your teeth just right using one hand to hold your plate like that. You could use a hold down of some kind sort of like the one Japanese maker does with his hand held punch. But that brings me to problem number two–your line of sight isn’t very good for lining the punch up by eye. Those Japanese makers have it literally right in front of their faces. With the fly press you are back a little farther, and believe it or not, that makes a big difference–and the smaller the teeth the worse it gets.
Also, did you notice how deliberately the Japanese makers worked? I’m attuned to that style of work myself, but Western saw makers would have wanted to do it faster. The biggest saw makers would have had guys who did nothing all day but punch saw teeth.
Let’s get back to Holtzapffel and wrap up this leg of our tooth punching extravaganza with his description of what appears to be a toothing gauge. This is on page 942 of Vol II of “Turning and Mechanical Manipulation,” if you have a copy.
“The teeth of saws are for the most part cut in the fly-press….Two studs are used to direct the edge of the blade for the saw to the punch, at the required angle depending on the pitch or inclination of the teeth, and an adjustable stop determines the space or interval from tooth to tooth, by catching against the side of the last tooth previously made.”
Instead of just analyzing what Holtzapffel wrote, what I’ll do is show you what I came up with. You’ll see how it both draws on Holtzapffel and differs from him. We’ll mount it up on the fly press and show it all in action. That means there is a lot left to go, and it will be very pic heavy—so why don’t we stop here for now, and we’ll pick up next time where we left off, with the toothing gauge.
Footnotes:
1. This method of punching teeth is mentioned in appendices 5, 7, and 8 of “Hand Tool Manufacture During the Industrial Revolution: Handsaw Making in Sheffield c.1750-c.1830,” by Simon L. Barley, 2008.
2. The 1823 Beardshaw ledger can be seen in Appendix 20 of the same dissertation.
(I want to acknowledge and thank the Sheffield Local Studies Library for permission to use the two engravings on this page. Also, a big thanks to Leif Hanson for the videos of the Japanese tool makers.)